How to Make Water Kefir: An Easy Probiotic Drink You Can Make at Home!
Water kefir is a delicious, fizzy probiotic drink that tastes like a lightly sweetened soda. And the best part is that you can make it at home with just a few ingredients! Learn how to make water kefir the easy way with these step-by-step instructions.
This post may contain affiliate links. See my full disclosure here.
If you’re a fan of kombucha, then you’ll love water kefir! Even though it tastes like a sweet treat, it’s actually a probiotic-rich beverage that’s loaded with good bacteria and beneficial yeasts that help support a healthy digestive system.
Water kefir is:
- Vegan
- Naturally sweetened
- Dairy-free
- Gluten-free
- 100% delicious!
Let me show you how to make water kefir so you can have an inexpensive, tasty probiotic drink to keep your gut happy.
Watch me make water kefir!
Here’s a demonstration of me making water kefir:
Water Kefir Health Benefits
Water kefir is a fantastic source of probiotics, which are the beneficial bacteria we need for a well-balanced gut microbiome.
Did you know that 70% of your immune system is housed in your gut (Source)? Water kefir supplies the probiotics that can keep your gut – and subsequently your immune system – happy.
Water kefir can also help regulate your digestive system. Probiotics are known to improve bowel movements and help with irritable bowel syndrome (IBS) symptoms, so water kefir can help support a healthy digestive system (Source).

More Reasons to Love Water Kefir
While water kefir has some pretty impressive health benefits, that isn’t the only reason why I love it. I used to exclusively drink store-bought kombucha to get my daily probiotics, but when I compare the two beverages, I think homemade water kefir is the clear winner.
Water kefir is:
- Quick to make – It takes about 3 days from start to finish to make a batch of homemade water kefir versus a week or more to make a batch of homemade kombucha.
- Cheap – You only have to pay the initial cost of the grains plus the ongoing cost of sugar to feed the grains and fruit or juice to flavor the kefir. This is much cheaper than buying premade kombucha!
- Decaf – Unlike kombucha (which is made from tea), water kefir has no caffeine, so you can drink it any time of day.
- Eco-friendly – Since you reuse the same bottles over and over, you don’t have to worry about accumulating a bunch of glass bottles like you do when buying pre-made kombucha.
Don’t get me wrong: I’ll still enjoy a bottle of kombucha when the mood strikes. But for my daily probiotics, I’ll stick with homemade water kefir.
How to Make Water Kefir
Water kefir requires a two-step fermentation process to get its signature carbonation.
The first ferment is where you feed the water kefir grains a sugar water mixture. The grains consume the sugar and turn the water into a probiotic-rich liquid that’s mildly carbonated.
The second ferment is where you flavor the water kefir using either fruit juice or small pieces of fruit. During this step, the water kefir builds up even more carbonation until it’s fizzy like a soda.
While it may seem like water kefir contains a lot of sugar, it really doesn’t. The water kefir grains consume most of the sugar throughout the fermentation process, and if you taste your water kefir periodically, you’ll notice it becoming less sweet as it cultures.

How to Make Water Kefir
You'll love this sweet, fizzy water kefir that's easy to make and full of living probiotics!
Ingredients
- 4 cups tap or spring water
- 1/4 cup high-mineral sugar blend (this is the blend I use: 4 cups cane sugar, 1 cup coconut sugar, and 1 Tbsp. pink Himalayan salt)
- 1/4 cup active water kefir grains
- 1/8 lemon
- 3/4 cup fruit juice or 1 cup sliced fresh fruit
Supplies
- 2 half-gallon mason jars
- Nonmetallic measuring cup
- Wooden spoon
- Light weave dish towel like a tea towel or flour sack towel
- Rubber band
- Nylon mesh strainer
- Small funnel
- 16-oz. swing top bottles (you'll need two for this recipe)
Instructions
Step 1: Prepare your water kefir for the first ferment.
Pour ¼ cup sugar into one of the half-gallon jars and cover with about a cup of water. Swirl the jar to dissolve most of the sugar. Fill the jar with the remaining 3 cups of water, and then add the lemon slice and ¼ cup of active water kefir grains.
Taste the water so you know how sweet it is immediately after mixing. This will give you a baseline so you know when your water kefir has finished its first ferment.
Cover the jar with a fine weave dish towel and secure with a rubber band. This lets the water kefir breathe while keeping out pesky fruit flies.
Step 2: Let your water kefir culture on the counter.
Let the water kefir sit on the counter or in a cupboard at room temperature for 24-48 hours, or until the water no longer tastes sweet. When it is finished with its first ferment, the kefir will taste tangy instead of sweet, and it might smell yeasty like bread. You’ll also notice a little bit of carbonation when you jiggle the jar.
I keep my house around 70-74 degrees Fahrenheit all year long, and that temperature usually requires a full 48 hours for my kefir to finish its first ferment. If your home is cooler than 68 degrees, you may need to use these tips to keep your water kefir grains warm enough so they culture properly. If your home is on the warmer side, your water kefir will ferment faster and may be ready in 24 hours.
Since home temperatures can vary, it’s important to taste your water kefir periodically so you know when it’s ready for the second ferment.
Step 3: Prepare your water kefir for the second ferment.
Once the water kefir has finished its first ferment, remove the cloth covering and take out the lemon slice. Place a nylon strainer over the second half-gallon jar and pour the water kefir through the strainer into the jar to catch the water kefir grains. Set the grains aside.
Add ¾ cup fruit juice to the water kefir and stir with a wooden spoon. If you’re using fresh fruit instead of fruit juice, add it in Step 5.
Now you’re ready to start bottling your water kefir for the second ferment.
Step 4: Bottle your water kefir.
If you’re using fresh fruit instead of fruit juice, divide it among your bottles. Place a funnel on a bottle and slowly pour in your water kefir until you reach the base of the bottle’s neck. This should allow about two inches of headspace so the water kefir has room to expand. (I used to fill my bottles with only one inch of headspace at the top, but they kept overflowing when I burped them! So now I leave extra room to prevent messes.)
Repeat with the other bottle and close the caps on both bottles.
Step 5: Let your water kefir culture a second time.
Place your bottles on the counter and let sit for 12-24 hours. Burp the bottles every 8 hours to release the pressure so your bottles don’t burst. To burp your bottles, carefully release the top and wait for the fizz to die down a bit before recapping.
After your water kefir is sufficiently fizzy, strain out the fresh fruit (if you used any), refrigerate, and enjoy!
Notes
Here are some ideas for flavoring your water kefir during the second ferment:
Juice such as apple juice, grape juice, cranberry juice, pineapple juice
Sliced fruit such as strawberries, blueberries (be sure to break the skins), raspberries, blackberries, kiwi, pineapple, grapes (break those skins too), peaches
Nutrition Information:
Yield: 4Amount Per Serving: Calories: 98
The calorie count for this recipe is approximate and should only be used for informational purposes.
My Favorite water Kefir Flavors
When it comes to flavoring your water kefir, the possibilities are virtually endless. I’m still exploring new flavors, but here are some of my favorite flavors so far:
Simple Apple Water Kefir
After the first fermentation, add 3/4 cup apple juice to your water kefir, bottle it, and let it ferment a second time for 12-24 hours. You’ll have a super fizzy apple-flavored soda!

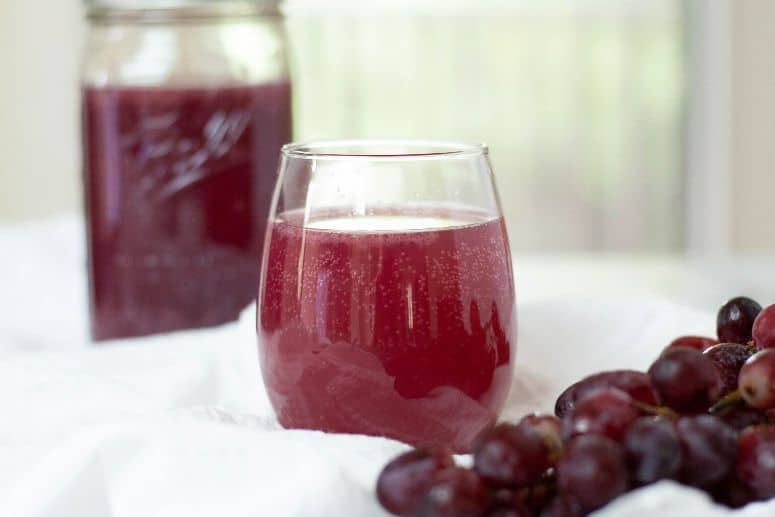
Fresh Grape Water Kefir
After the first fermentation, divide 1 cup chopped grapes among your bottles and fill the rest of the way with water kefir. Let it ferment a second time for 12-24 hours for a lightly-flavored grape soda!

Apple-Pineapple Water Kefir
Josh’s favorite flavor so far is apple-pineapple water kefir. It smells like a tropical paradise! After the first fermentation, mix 1/3 cup apple juice and 1/4 cup freshly chopped pineapple to your water kefir. Bottle it and let it ferment a second time for 12-24 hours. Delish!
Helpful Tips When Making Water Kefir
Water kefir is acidic and can react to metal, so use nonmetallic tools when making water kefir.
You do not need to burp your water kefir after you put it in the refrigerator. Refrigeration stops the carbonation process, so your kefir will not build up more pressure.
You can make water kefir in mason jars, but you might not get as much carbonation since mason jars don’t seal off as well as swing top jars. You could also try making water kefir in old kombucha bottles since those are made of thick glass and can withstand the pressure from the carbonation.
Do not use less sugar than what the recipe calls for! The sugar is for your grains, not you. Using less sugar can starve your grains and cause them to die. The grains will consume most of the sugar in the first ferment, and the final product will have very little sugar.
Water kefir grains thrive in a mineral-rich environment, but it is possible to over-mineralize them. I notice that my grains get a sulfur-like smell after a while, and that usually means I need to rest the grains. To do that, I simply rinse the grains and store them in the refrigerator in a jar of filtered water for about 3 days. After that, the sulfur smell is gone.
When water kefir grains are happy and thriving, they will usually multiply with each batch of water kefir you make. If your grains do not multiply, you can use these tips to encourage growth.

What to Do with Extra Water Kefir Grains
After you make a few batches of water kefir, you might notice that your grains have multiplied exponentially. That’s a good thing! It means your grains are happy and thriving.
But if you’re wondering what to do with extra water kefir grains, then here are some ideas:
- Give your extra water kefir grains to friends.
- Add water kefir grains to smoothies.
- Add water kefir grains to popsicles.
- Store them! You never know when you’ll need them.
How to Store Water Kefir Grains
If you want to store your extra water kefir grains or if you need to pause your water kefir-making process while you go out of town, you can store your grains in the refrigerator for a few weeks without any problems.
To store your water kefir grains, fill a quart mason jar about halfway with water and dissolve a tablespoon of sugar in it. Place your kefir grains in the sugar water, cover with a lid, and store in the refrigerator. Change the sugar water weekly so the grains have fresh food.
If you need to store your grains for longer than a few weeks, you can try some of the suggestions in this article.

Frequently Asked Questions
Can I use tap water to make water kefir?
Yes, you can use tap water to make water kefir. You don’t even need to filter it. Water kefir grains thrive in a mineral-rich environment, so if you happen to have hard water, this is one time when hard water comes in handy.
The only catch is that chlorine will kill your water kefir grains, so you need to let the chlorine evaporate (called off-gassing) first before you put your kefir grains in tap water. To do this, simply fill a pitcher with water and let it sit uncovered for 24 hours to give the chlorine time to evaporate into the air.
You can also use spring water when making water kefir.
How much kefir water should I drink?
If you’re new to the world of probiotics and water kefir, then you should probably start out by drinking half a cup of water kefir a day to see how your body reacts. Even though probiotics are great for gut health, if your body isn’t used them, then you may experience some unpleasant digestive problems like bloating, gas, or even diarrhea.
Start with half a cup of water kefir and then gradually increase the amount as your body gets used to the influx of probiotics.
Since Josh and I are used to a lot of probiotics, we each drink about a quart of water kefir every day. I really don’t think there’s a limit to how much water kefir you can drink each day as long as you don’t have any unpleasant side effects.

Can you eat water kefir grains?
Yes! Water kefir grains are powerhouses of good yeast and bacteria, so don’t waste them. Add some grains to your morning smoothie for an extra probiotic boost.
Does kefir water contain alcohol?
Alcohol is a natural byproduct of fermentation, but the amount of alcohol in kefir water is so insignificant that it’s classified as a nonalcoholic beverage.
What kinds of sugar can I use to make water kefir?
Water kefir grains need a mineral-rich environment to thrive, and sugar is one way you can control the amount of minerals your water kefir grains consume.
Some good choices for sugar along with their mineral content include:
- White sugar – none
- Cane sugar – medium
- Turbinado – medium
- Coconut sugar – high
- Rapadura or sucanat – high
- Brown sugar – high
- Pure maple syrup – high
From what I can tell, a lot of people prefer using a mix of sugars to get the right balance of minerals. The idea is to pick a sugar with a medium mineral content as the base (cane sugar seems to be the preferred one), and add a small amount of high mineral sugar to balance it out.
The sugar mixture I use is four cups of cane sugar, one cup of coconut sugar, and one tablespoon of pink Himalayan salt. I learned how to make this blend from this article.
Keep in mind that using high-mineral content sugar by itself can damage your water kefir grains, so it’s a good idea to balance it with a low- to medium-mineral content sugar (Source).
Also, do NOT use sugar substitutes such as stevia or Splenda. These are not real sugars and will starve your grains. Remember, the sugar is for your grains, not for you.
Can I make water kefir with honey?
It’s generally not recommended to make water kefir with honey. Honey has antibacterial properties that can damage your water kefir grains (remember that the grains are composed of yeast and bacteria).

Final Thoughts on How to Make Water Kefir
Water kefir is such a cheap, fun, and tasty way to get your daily probiotics, and I just know you’ll love making it as much as I do! And since you have limitless options for flavors, you can try a different flavor with every batch you make.
When you try this recipe, please let me know how it turned out for you by leaving a comment below!
Looking for More Healthy Lifestyle Articles? Check These Out:
- 10 Ways to Boost Your Immune System Naturally
- How to Make Nettle Tea (Perfect for Indoor and Seasonal Allergies!)
- 5 Crucial Things I Did to Ditch My Chronic IBS for Good
- The Dirty Dozen and Clean Fifteen (Free Printable List!)
- 12 Healthy Habits You Can Start Today

Want to remember this? Save it to your favorite Pinterest board by clicking the images below!


My water kefir is going great, on my 5th batch. I’m ready to double it. Can I make a double batch in one jar, would it work the same way just doubling all ingredients? G Leslie
Hi G, you can definitely double the ingredients as long as your jars are big enough to hold double. I like my jars to have plenty of extra room so the liquid doesn’t splash out when I move them. 🙂
I’m on the second ferment in the bottles. So far so good ! Had about 3/4 cup left over, hate to waste it! And will this work with our keto diet? G Leslie
Hi G, You can actually drink that leftover bit after the first fermentation, although it won’t be fizzy or flavored. I usually just add it to another bottle for second fermentation even though it won’t fill the bottle all the way. I hate to waste any too, so I just make it work 🙂 As for water kefir being keto friendly, I did a little bit of research and it looks like it can work for the keto diet. The recipes I found use real fruit instead of fruit juice for the second fermentation, so that might be something to try. Berries, melons, and even peaches seem to be good options. Just keep in mind that the sugar in the first ferment is for the kefir grains, not you. Virtually none of that sugar will be left after the grains consume it, so I don’t think you have to worry about the sugar content in the first ferment.